Your files and folders are a mess and you think life would have been great if I had different sections for different things. So, worry not, because here is where your tech-friend Geek comes to the rescue. Today, let’s learn about how to create and mount Linux partitions. Think of this as setting up your own digital workspace where you can organize your files and systems like a pro. Buckle up and let’s get started!
What is a Linux Partition?
So, first things first, before getting into the “how-to,” let’s define what a partition truly is?.
Imagine you have a pocket of Doraemon in your hard drive where he keeps all his stuff, but the moment Nobita requires any of it, he has a hard time finding it. Then comes our hero, the partition.
Essentially, a partition is part of your hard drive. It is a naming convention for cutting a disk into independent areas that then become separate storage locations. This comes very useful in the case you want your system files separated from your personal data or you run multiple operating systems on the same computer.
Why the need of Partition?
You might think, “Geek, why do I need to partition? I can just store it as it is.” Yes, you can. But won’t it be hard to locate your files and folders when urgently needed? Wouldn’t it be better to arrange all your files and folders properly? Let me say some pros of partitioning:
- Improved Organization: By doing this, you will be able to manage your operating system and your personal files separately, which can be better kept and backed up.
- Improved Security: System files are isolated from user data to avoid corruption and prevent malware.
- Improved Speed: Some special task purpose partitions may improve the whole operating system performance.
How do I create and Mount Linux partition?
Well once you have known the basics, here we go:
What we require:
- Partition Tool: fdisk is CLI-based while GParted is GUI-based.
- Terminal: Command line interface
Other tools for partition are “parted” and “cfdisk”, but in this we’ll be using “fdisk” and “GParted”
Using fdisk
Step 1: Check Existing Partition
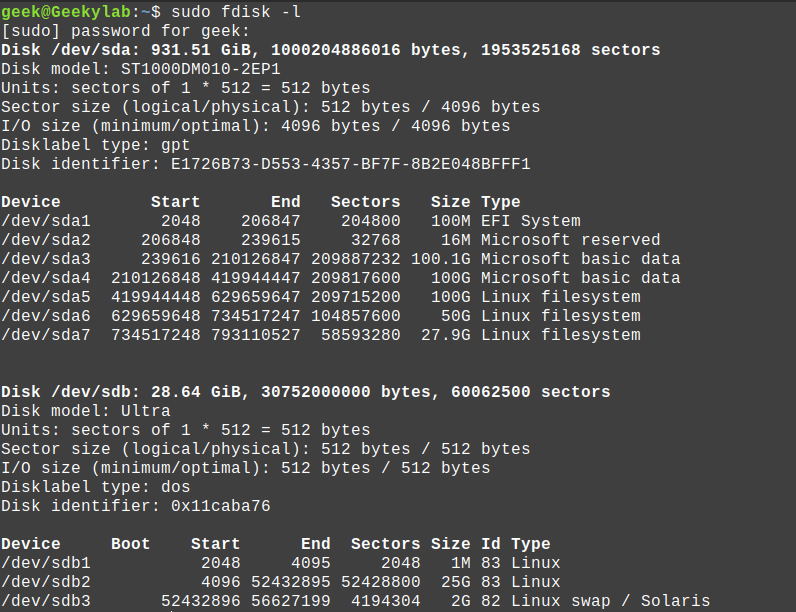
First, lets check what partitions are already existing on the system. Open your terminal and type the following command.
- “sudo fdisk -l”
- The “-l” switch lists all the partition existing on the disk
Enter the password when prompted, and it will list all the partitions. You will get something like this
Step 2: Select the Disk to Partition
Provided you have attached more than 1 disk to your system, you must decide which one you want to partition. In this example e’ll use: “/dev/sda”. The following command would do that.
- “sudo fdisk /dev/sda“
- Replace “/dev/sda” with the disk name of your disk.
Press enter, and you will enter into the command mode of “fdisk”. It could get a bit confusing but no worries — I’ll walk you through it.

Step 3: New Partiton Creation
Let us create a new partiton. Enter “n” for a new partition and then respond to the prompts.
- Partition Type: Enter ‘p’ for primary partition.
- Partition Number: Enter the number. The range would be(1-4 for primary partitions). Just hit “ENTER”
- First Sector: Hit “ENTER” to accept the default.
- Last Sector: Enter size of the partition. As an example, for 20 GB it would look like “+20G”.
It should be like this:

Step 4: Writing the Changes to Disk
After creating a partition you need to write it to the disk. To do that by type “w” and press “Enter”

Voilà, you have created a partition! But hang on, we are not yet done.
Step 5: Format the partition
A partition needs a filesystem to store data. Without a filesystem your data would be one big, pile of bytes with no way to tell where one file ends and another begins. I have already covered Linux File Systems here.
You can format the partition using the terminal tool called “mkfs”. In this, we will use ext4, a popular Linux filesystem:
- “sudo mkfs.ext4 /dev/sdaX”
- Relpace the X with the number of the new create file system, you can check that using the “fdisk -l” command.

Step 6: Mounting the Partition
Creating a Directory
Ok, now, finally mount the partition to start using it. But before that we need to create a directory where we can mount the new partition. Lets create a new directory called new_partition
- “sudo mkdir /mnt/new_partition“
- The name is dependent on the user’s preferences and tastes. This can be done in different locations.
Mounting your new Partition
Having created the directory, let’s mount our new partition. The command below is what mounts the partition.
- “sudo mount /dev/sdaX /mnt/new_partition“

TIP:- you can run the “df -h+”* to check for your self that the partition is mounted:
Step 7: Permanent mounting of Partition
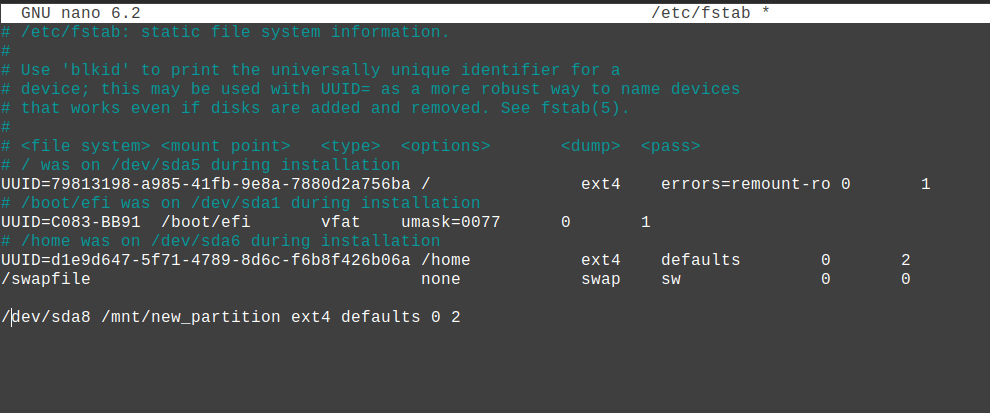
You have just created and mounted the partition, but after you run a reboot of your system, you will need to re-mount the new partition with every system reboot. So, if you require for your partition to be mounted during the boot, you should make some modifications to a file called “fstab.” This file tells the system which partitions to mount and where.
- Edit the fstab Open your favorite editor and edit the fstab.
- “sudo nano /etc/fstab”
- Note: You have to be the root in case of editing fstab.
- Add the Partition Now, at the very end of the file, we add a newline for our new partition.
- “/dev/sdaX /mnt/new_partition ext4 defaults 0 2“
- This line tells the system to mount “/dev/sdaX” at “/mnt/new_partition” with default options Wow! It’s finally finished. You can now use your new partition for your files.
Fun Fact: Linux can support up to 15 partitions on a single disk, but for most people, three or four are plenty!
Using GParted
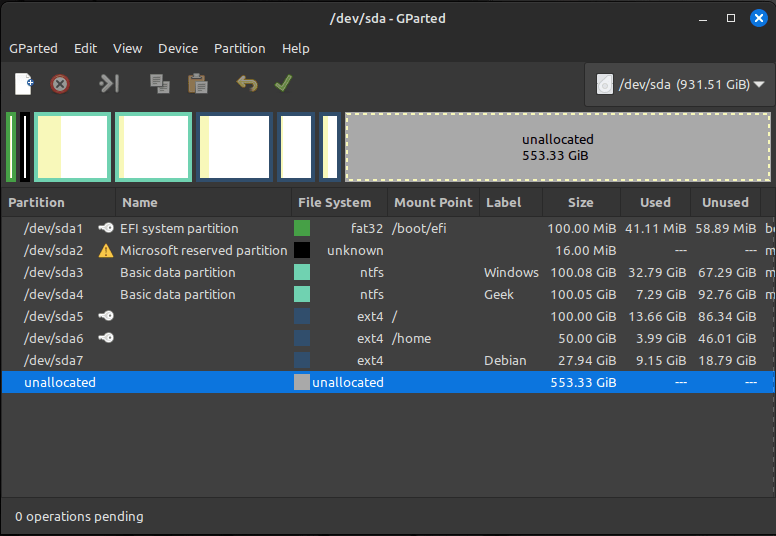
GParted is a graphical partition editor that makes partition management easy.
Step 1: Install and Launch GParted
If GParted is not installed yet, you can install it with the following command:
- “sudo apt install gparted”
Once installed, open GParted either through the apps menu or simply by typing nothing in the terminal other than “gparted”.
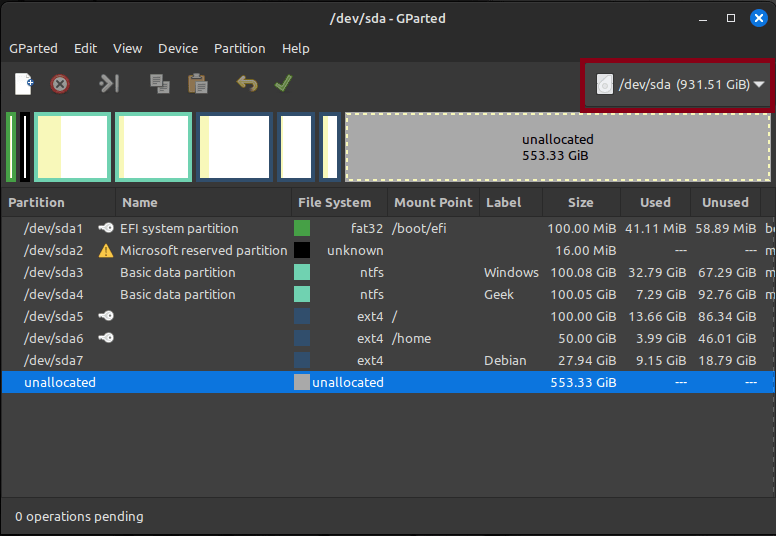
Step 2: Select Disk
Select the disk you want to partition by selecting it from the drop-down which appears at the top-right corner of the window. Care must be taken to select the right disk!
Step 3: Create New Partition
- Resize an Existing Partition:
- If you do not have enough space, right-click on an existing partition and select “Resize/Move.” Or, if you’ve already got free space:
- Create a New Partition:
- After that, right-click on this unallocated space and select “New.”
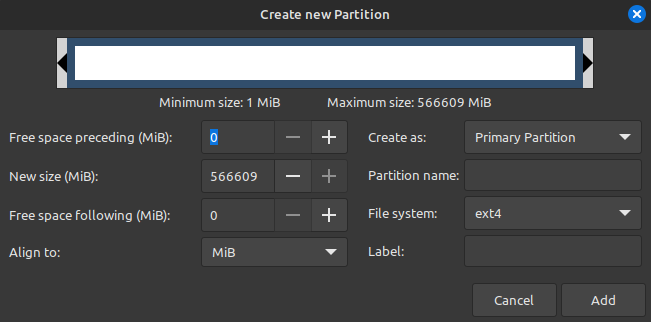
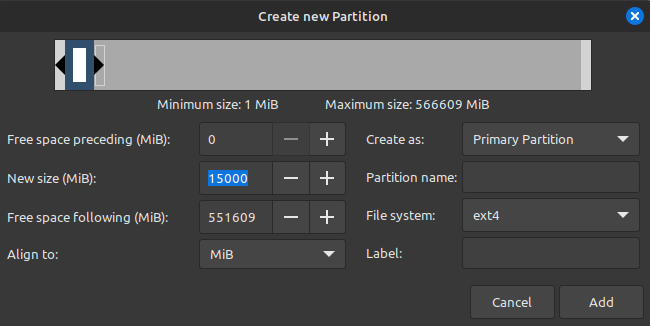
- Set Up Parameters of the Created Partition:
- Choose the type of file system (example – ext4 for Linux) the size and label, and click on “Add.”
Step 5: Apply Changes
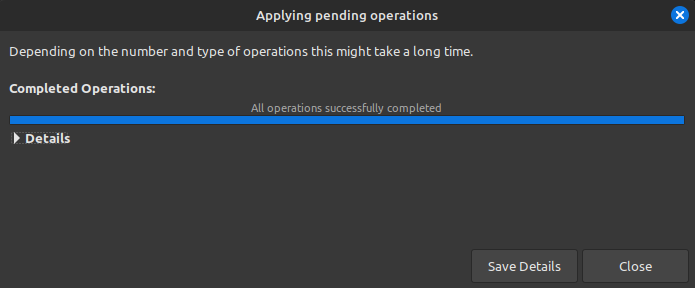
Finally, clcik the green checkmark in order to apply all the changes, and you are done with your new partition.
For mounting this new partition, the same steps can be taken by us which we executed using the method of fdisk.
TIP: Make sure that you have labeled your partition, as it will make managing easier.
Conclusion
And there you have it: your comprehensive guide on how to create and mount Linux partition! Whether you used GParted or the command line, you know how to attack that disk space and win.
Now that you’re all set with the basics, why not try something new? Make some different file systems, or maybe even something with the Logical Volume Manager for more advanced setups. The world of Linux really is your oyster!

